Paint Matching & Refinishing: Save Time and Cut Rework (2026)
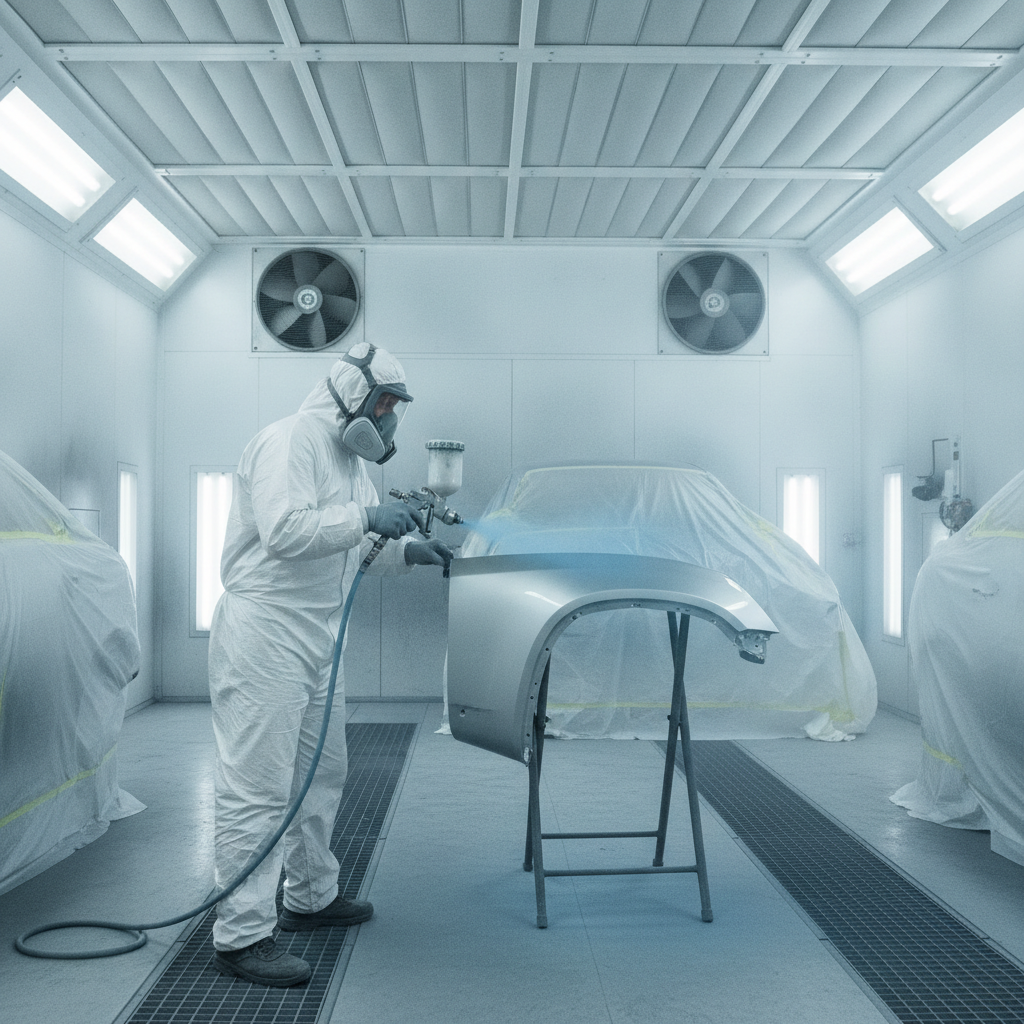
Paint matching and refinishing is the professional process of restoring a vehicle’s finish so repaired panels match the original color, texture, and gloss. It aligns factory paint codes with advanced color tools, then blends and clears for an invisible repair. In Burnaby, we use this process daily to return vehicles to pre-accident appearance and protect value.
By A1 Buller Auto Collision • Last updated: July 7, 2026
Summary
This guide explains what paint matching and refinishing means, why exact color match matters after a collision, and how professionals achieve factory-level results. You’ll see step-by-step workflow, blending methods, tools we use, Burnaby-specific tips, and real case examples—so you know what to expect and how to spot quality.
Here’s what you’ll learn at a glance:
- Plain-English definition of the paint matching and refinishing process
- Why accurate color and gloss retention protect your vehicle’s value
- Step-by-step workflow our certified technicians follow
- Blending methods for metallics, pearls, and tri-coats
- Tools and resources used in professional refinish shops
- Local notes for Burnaby drivers and ICBC-insured claims
- Actionable aftercare to keep your new finish looking its best
What is the paint matching and refinishing process?
The paint matching and refinishing process restores a damaged panel to factory appearance by identifying the exact color variant, preparing the surface, applying base and clear coats, and blending into adjacent panels. The goal is an invisible repair where color, metallic flop, and gloss match every viewing angle.
In practice, “match” means more than just color. It covers hue, metallic/pearl orientation, gloss, and texture. Our technicians in Burnaby align OEM color codes with a variant formula, validate with a spray-out card, then blend and clear for a seamless transition across panels.
Core elements you should know
- Color identification: OEM code + variant formula; spectrophotometer scan confirms direction.
- Surface prep: Clean, sand, repair, prime, and block for a smooth substrate.
- Application: Controlled basecoat passes, proper flash, and UV-stable clearcoat build.
- Blending: Feathering color and clear for a transition you can’t spot under shop lights or daylight.
- Curing and polish: Measured bake or air-dry, then refinement to remove minor dust nibs and achieve mirror gloss.
When each step is performed in sequence, the finish reads “factory” in both bright sun and low light. That’s the standard our ICBC-recognized team aims for on every job.
Why precise color match matters after collision repair
Precise color match preserves resale value, avoids obvious repair lines, and protects adjacent panels from over-sanding and rework. A correct match also ensures metallics lay right so the finish looks consistent in sun, shade, and at different angles—crucial for modern pearls and tri-coats.
Even a small mismatch can telegraph the repair. You may not notice indoors, but step into midday sun and a silver might shift warm or cool, or pearls may sparkle unevenly. Perfecting hue, value, chroma, and flake orientation reduces returns and maintains trust when you sell or trade in.
Consequences of poor matching
- Visible repair edges: Hard lines show under certain lighting; the eye catches them right away.
- Rework cycles: Extra sanding and repainting increase downtime and inconvenience.
- Lower perceived value: Appraisers and buyers quickly spot mismatched finishes.
Benefits you can feel
- Confidence at handoff: The vehicle looks “like it never happened.”
- Durable protection: Quality clears add UV resistance and chemical resilience.
- Insurance alignment: Workflows that meet insurer expectations simplify claims for ICBC-insured drivers.
If you’re uncertain about a recent repair, bring it by our Burnaby shop. Our collision repair experts can evaluate the finish under neutral lighting and discuss options.
How the paint matching and refinishing process works (step-by-step)
A professional refinish follows a predictable sequence: assess and code the color, map the damage, repair and prime, mix a variant, validate with a spray-out, blend the base into adjacent panels, apply clear, cure, then polish and inspect. Each step reduces variables and ensures an invisible repair.
Standard professional workflow
- Assess and color code: Confirm OEM code, build list of possible variants, and scan the panel with a spectrophotometer.
- Map damage and remove trim: Identify where to repair and where to blend. Remove badges, moldings, and lights.
- Metal and plastic repair: Straighten, fill, and sand. For plastics, use adhesion promoter and flexible primers.
- Prime and block: High-build primer, guide coat, and progressive sanding for flatness.
- Mix and test: Mix to the variant formula; make a spray-out card; compare under daylight/LED.
- Basecoat application: Controlled passes, consistent overlap, and proper flash between coats.
- Blend adjacent panel(s): Feather color into the next panel to hide the transition.
- Clearcoat application: Even wet coats for film build; avoid dry spray on blend edges.
- Cure: Bake or timed air-dry; verify surface temperature and hardness before handling.
- Polish and inspect: De-nib, refine, and inspect under multiple light sources.
| Step | Purpose | Pro Tip |
|---|---|---|
| Color ID | Find accurate variant | Scan and spray-out to confirm in real light |
| Surface Prep | Create flawless substrate | Finish sand with appropriate grit to avoid scratches |
| Basecoat | Lay color and effect | Maintain gun distance for even metallic orientation |
| Blend | Hide transition | Feather passes; extend clear to a natural break |
| Clearcoat | Gloss and protection | Two full coats with proper flash; watch panel temps |
| Cure & Polish | Durability and clarity | Allow full cure window before final polish |
Want this process on your car? Book a quick look at our Burnaby shop—start with a free auto body estimate so we can map the best path to an invisible repair.
Types, methods, and approaches that pros use
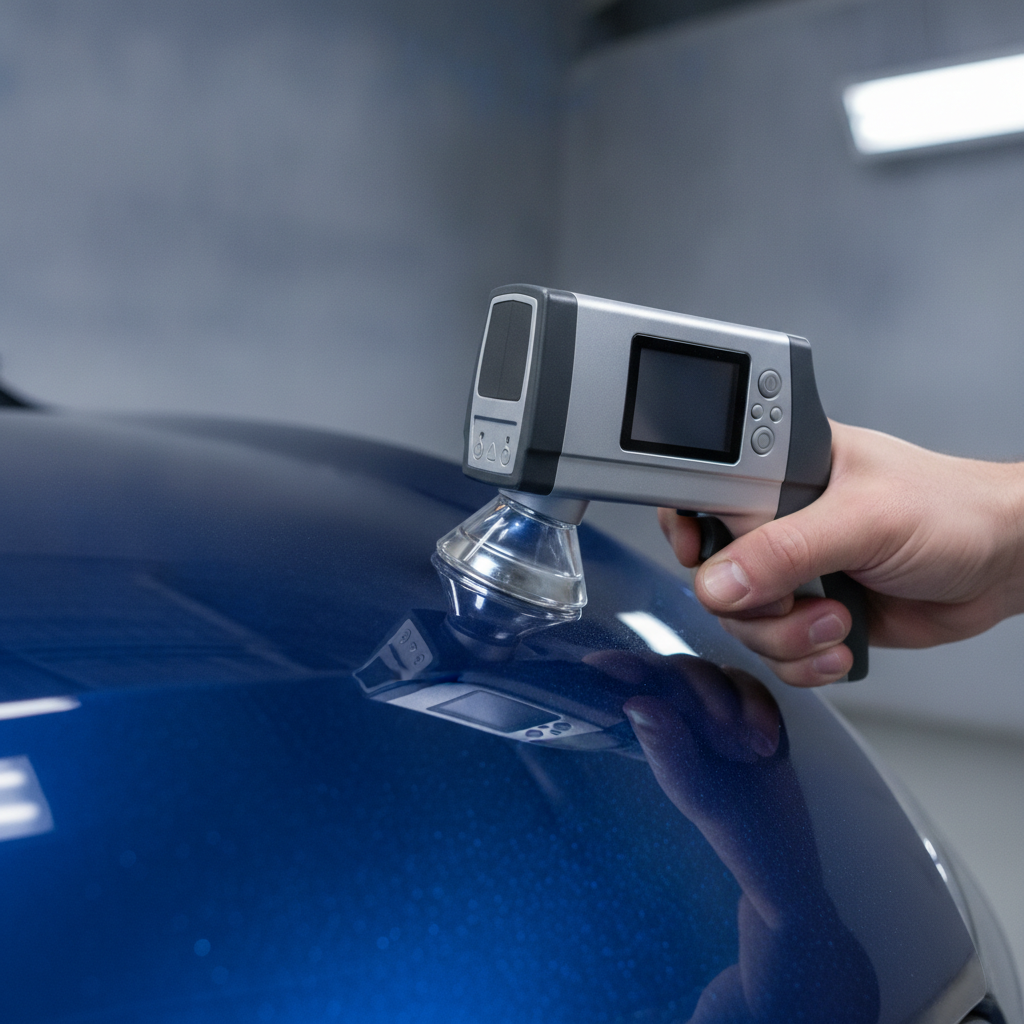
Pros combine OEM codes, variant decks, and spectrophotometer scans with three primary approaches: spot repair, panel painting, and blend-and-clear into neighboring panels. For metallics, pearls, and tri-coats, controlled gun technique and blend strategy ensure the effect “flops” correctly in real-world light.
Common refinish scenarios
- Spot repair: Small chips or scratches resolved within a limited area, often followed by a localized clear blend.
- Single panel: Full repair and refinish of one panel; often requires blending into an adjacent panel for metallics.
- Multi-panel/edge-to-edge: When color sensitivity is high, refinish multiple adjacent panels for a uniform appearance.
Paint system nuances
- Two-stage metallics: Basecoat lays color and flake; clearcoat adds depth and protection.
- Tri-coats and pearls: A tinted midcoat creates candy depth; blend windows are longer and technique-sensitive.
- Solid colors: Easier to match without blends, but gloss and orange peel still need to read “factory.”
Choosing a blending strategy
- Feathered base into adjacent panel: Hides color edge; typical for metallic and pearl finishes.
- Soft edge within same panel: Useful on larger uninterrupted panels when a natural break exists.
- Full edge-to-edge: When OEM variant sensitivity is high or the vehicle is older with sunfade.
| Approach | When to Use | Strength | Watch-out |
|---|---|---|---|
| Spot Repair | Small chips/scratches | Minimally invasive | Risk of visible edge if effect colors |
| Single Panel | Solid colors, some metallics | Focused control | May need adjacent blend |
| Blend & Clear | Most metallics/pearls | Invisible transitions | Technique and lighting sensitive |
We’ll help you choose the least invasive route that still reads perfect to the naked eye. If your car uses effect-heavy paint, our ICBC PLATINUM PARTNER team will recommend smart blends to prevent panel-to-panel shifts.
Best practices that deliver factory-level results
Factory-level results come from disciplined prep, controlled spray technique, accurate variant selection, and thorough lighting checks. Shops that standardize grits, gun setup, booth temps, and light angles reduce rework and deliver finishes that look right in daylight, shop LEDs, and evening shade.
Preparation and environment
- Clean room mindset: Mask meticulously and tack surfaces to reduce dust nibs.
- Consistent substrate: Finish-sand uniformly so basecoat builds evenly.
- Temperature and humidity: Stabilize booth conditions to avoid solvent trap or dry spray.
Application discipline
- Gun setup: Match tip size and pressure to product and technique.
- Pass overlap and distance: Keep even to maintain metallic orientation and avoid tiger striping.
- Flash times: Respect product windows for proper solvent release and adhesion.
Quality verification
- Spray-out cards: Test panels under daylight and LED to confirm hue and flop.
- Multi-angle check: Evaluate at 90°, 45°, and shallow viewing angles.
- Post-cure polish: De-nib and refine for glass-like clarity without thinning edges.
Our Burnaby technicians follow a unified checklist on every job. That discipline is why drivers refer to A1 Buller Auto Collision when they want finishes that pass scrutiny in any light.
Tools and resources we use (and why they matter)
Modern refinish work relies on calibrated spectrophotometers, OEM color databases, premium base/clear systems, and controlled lighting. These tools remove guesswork, speed up matching, and reduce rework—so you’re back on the road faster with a finish that holds up.
Core shop tools
- Spectrophotometer: Measures color at multiple angles to guide variant selection.
- Variant decks and OEM databases: Cross-checks for factory-accurate formulas.
- Downdraft spray booth: Cleaner airflow pattern reduces contamination.
- Color-matched LEDs: Reveal shifts that ambient light hides.
- Quality abrasives and primers: Consistent scratch patterns yield flatter finishes.
Helpful background reading
Case studies and real examples from Burnaby
Real vehicles prove the process. Here are condensed scenarios from our Burnaby work: a silver metallic with panel-to-panel shift, a pearl white tri-coat with midcoat control, and a sun-faded red needing strategic blending. Each shows how careful prep and lighting checks avoid do-overs.
Silver metallic, hard sunshine reveal
- Challenge: Rear bumper respray looked fine indoors, but under noon sun the flake orientation read darker than the quarter panel.
- Action: We rescanned, adjusted reducer/air pressure, and blended base into the quarter; full clear to a natural break.
- Result: No visible transition at three angles; pass under color-matched LEDs and in daylight near Royal Oak Station.
Pearl white tri-coat with midcoat sensitivity
- Challenge: Hood damage on a pearl white needed uniform midcoat passes to keep depth consistent.
- Action: We stabilized booth temperature, timed flashes precisely, and controlled gun distance for even pearl.
- Result: Factory-like candy depth; transition invisible by the Nikkei National Museum & Cultural Centre pickup point.
Sun-faded red on daily driver
- Challenge: Oxidation shifted the decklid warmer than adjacent panels.
- Action: Chose a near variant, feathered into quarters, and cleared edge-to-edge.
- Result: Unified color in shade and sunlight; owner approved under LEDs and late-day sky.
Each outcome hinged on disciplined prep, variant control, and lighting checks—exactly the habits our certified technicians practice every day.
Local considerations for Burnaby
- Sun and rain swings matter: test spray-outs in outdoor light and under neutral LEDs to confirm hue and metallic flop before clearing.
- If you commute near Royal Oak Station, request protective film edges to reduce chip risk on freshly refinished bumpers.
- Weekend drop-offs help: our extended hours make it easier to plan around work and school events at the Nikkei National Museum & Cultural Centre.
Post-refinish care, inspection, and related checks
After refinishing, avoid harsh chemicals and automated washes during the initial cure window, then wash by hand and apply protection later. Inspect panel gaps and finish in bright and indirect light. If a collision also affected suspension, schedule alignment and tire/brake checks to prevent uneven wear.
48 hours to 2 weeks: baby the finish
- Avoid harsh wash chemicals: Use mild soap and soft mitts only.
- No automatic brushes: Wait until the finish reaches full hardness.
- Parking tips: Prefer covered parking while clear fully hardens.
30–60 days: protect smartly
- Hand wash and dry: Keep surface clean to reduce micro-marring.
- Apply protection later: Ask us when wax/sealant is appropriate for your product system.
- Inspect in multiple lights: Verify color and gloss at noon sun and under LEDs.
Don’t forget safety systems
- Wheel alignment check: After a hit, confirm alignment to prevent tire wear and pull.
- Brake and tire inspection: If you notice new vibration or noise, have our team review pads, rotors, and tire balance.
- A/C system: We can also service A/C if condenser or lines were impacted.
Curious how this ties to our broader maintenance content? See how finish work relates to drivability topics like brake feel (think “brake pads vs brake rotors” differences) and alignment-induced tire wear. Our Burnaby shop handles body and select mechanical checks together.
Frequently Asked Questions
Most questions center on match accuracy, blend needs, cure times, and aftercare. Below are crisp answers Burnaby drivers ask our team most often—so you can plan with confidence and know what to look for at pickup.
How do you guarantee the color will match?
We start with the OEM code, then confirm the correct variant using a spectrophotometer and a spray-out card compared under neutral LEDs and daylight. For metallics and pearls, we blend into adjacent panels to ensure the effect reads true at multiple angles.
Do you always have to blend into the next panel?
Not always. Solid colors can sometimes be done panel-only. Metallics, pearls, and tri-coats usually benefit from blending to hide transitions, especially on large, flat areas where light reveals edges.
How long before I can wash or wax the refinish?
Gentle hand washing after the initial cure window is fine, but avoid harsh chemicals or automatic brushes until the finish fully hardens. Ask our team when your specific product system is ready for wax or sealant.
What lighting do you use to check the match?
We evaluate under neutral, color-matched LEDs and then in daylight outside. Checking at different angles and light temperatures ensures hue, value, and metallic flop read correctly in the real world.
Can you help with ICBC claim steps related to refinishing?
Yes. As an ICBC-recognized shop, we help coordinate estimates and repairs for ICBC-insured vehicles. We’ll outline the refinishing plan up front so expectations are clear.
Key takeaways
Flawless refinishing depends on color accuracy, disciplined prep, controlled application, and thorough lighting checks. Blending is often essential for effect colors. Ask your shop about variant selection, spray-outs, and inspection lighting—and request a simple aftercare plan before you leave.
- Exact color, gloss, and effect match are the core goals.
- Spray-out tests under LEDs and daylight prevent surprises.
- Blending into adjacent panels hides transitions on metallics/pearls.
- Let the finish cure before aggressive washing or protection.
- Bundle related checks: alignment, tires, brakes, and A/C when relevant.
Conclusion: Your Burnaby guide to an invisible repair
An invisible refinish isn’t luck—it’s process. With correct variant selection, disciplined prep, smart blending, and multi-light inspection, repaired panels disappear to the eye. If you want that factory look in Burnaby, start with our quick assessment and we’ll map the right steps for your vehicle.
Ready to talk through your vehicle’s finish? Reach our Burnaby team at A1 Buller Auto Collision. We’ll assess your vehicle, explain the paint matching and refinishing process in plain language, and schedule work that fits your week.